Configure to use the accounts which follow OAuth2 protocol |
iPortal, iServer and iEdge not only support login with existing accounts, but also with third-party accounts based on the OAuth 2.0 protocol. The following will introduce the configuration and usage of third-party login ways by taking iServer as an example.
iServer currently supports direct configuration of QQ and Sina Weibo account login, and also supports the use of other services through extension. For third-party login under the OAuth2.0 protocol, please refer to the third-party login ways extension under the OAuth2 protocol. After configuring the third-party login, you can directly use the third-party accounts such as QQ and Sina Weibo to log in the iServer, or bind the third-party account with the iServer account.
Note: URL address for QQ OAuth2.0 authentication is https://graph.qq.com, and the URL address for Sina Weibo OAuth2.0 authentication is https://api.weibo.com.
Log in to the service management server, click "Security" and "third-party configuration" in turn to configure the use of third-party login ways.
After you have configured the third-party login ways, you can access the login page with the service domain name (callback domain above) to view all the third-party login ways that have been configured so far, and you can log in iPortal, iServer or iEdge using these third-party login ways (if your application is not officially approved by the official website, you can only use the specified QQ or Sina Weibo test account login, otherwise, you can use all QQ or Sina WEIBO account login.) . As signing in to the iServer with a QQ account an example.
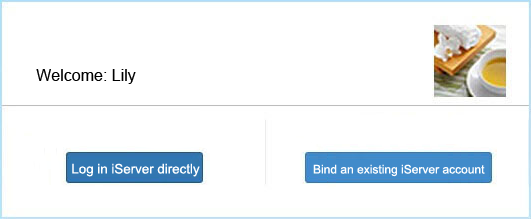
Click the "QQ account login" button on the login page, and the QQ login page will pop up. You need to enter the QQ account and password here correctly. If you are using it for the first time, QQ account login iserver, then after you click the "authorize and login" button, the following dialog box will appear:
If you already have an iServer account, please click the "Bind iServer Account" button to bind your QQ account to your iServer account. You can use both your iServer account and QQ account to log in to iServer next time. When you log in to iServer with your QQ account, you have the same permissions as the iServer account bound to your QQ account. If your iServer account has administrator privileges, then when you log in to iServer with your QQ account, you can access all pages of iServer.
If you do not have an iServer account yet or have an iServer account but do not want to bind it with a QQ account, please click the "Login to iServer Now" button to log in to iServer using your QQ account. At this point, the username is a random string on the users page( http://localhost:8090/iserver/manager/security/users )You can view this random string. It should be noted that you did not bind your existing iServer account when logging in for the first time. From now on, you can only log in to iServer with your QQ account and only have access to the service instance.